Showing posts with label mild spicy. Show all posts

Sunday, November 4, 2018

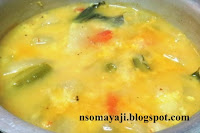
Ash Gourd - Moong Dal Bolu Huli /Curry

Ash Gourd - Moong dal Curry /Bolu Huli is one of the traditional dish from Udupi / Karnataka. I have added  tomatoes and fried moong dal. It is easy to prepare and easy to digest. One more healthy curry that you surely enjoy with all the main dishes.


Ash Gourd is filled with nutritious, vitamins and medicinal values. We do use each part of this vegetable, like the outer layer is used for preparing chutney. The vegetable is used for curry and other dishes. The inner part/pulp is used for curd curry and the seeds are dried and dry roasted and eaten.
Here I have prepared " Bolu Huli " which means curry that does not have coconut init. So the curries which are prepared with out using the coconut is called " Bolu ". ( ಬೋಳು).
Let us see some benefits of eating Ash Gourd /ಬೂದು ಕುಂಬಳಕಾಯಿ .
Ash gourd is also known as kumbalakayi. booda kumbalakayi in Kannada. The pumpkin is known as sihi kumbala.
Ash gourd is good for diabetic people. It is also good for loosing extra weight. Ash gourd juice helps to treat acidity and peptic ulcer. Ash gourd is good for people who suffer from constipation.
Ash Gourd is rich in fiber and contain Vitamin C and minerals like phosphorus, iron and calcium.
 Let us see the recipe Now :
No Onion or No Garlic is used in this Ash Gourd - Moong Dal Bolu Huli /Curry.

Ingredients :

Ash Gourd : 1 Big bowl. (250 Grams).
Moong Dal : 1 Small cup. /2 to 3 Tablespoons
Green chilly : 3 to 4
Tomatoes : 2 ( Medium sized )
Ginger : An inch
Salt : As required
Turmeric Powder : A pinch
Coriander leaves : 2 to 3 Tablespoons
Lemon : 1/2 lemon juice  /1 Teaspoon
For seasoning :
Oil : 1 Tablespoon
Mustard seeds : 1 Teaspoon
Urid dal : 1/2 Teaspoon
Curry Leaves : 5 to 6
Ingh / Asafoetida : A pinch ( A little )

Method : 

1. Wash Ash gourd nicely and remove its outer hard layer. Remove the pulp and seeds.
2. Cut the vegetable into small pieces. Keep it aside.

3. Wash tomatoes, curry leaves, coriander leaves, green chilly and keep it aside.
4. Wash and remove the outer layer of ginger and wash it again. Grate it and keep it aside.
5. Cut tomatoes, slit green chilly and cut coriander leaves. Wash and cut lemon in to halves. Squeeze out the extract from half lemon.
6. Keep a pan on the fire and heat. Put oil and mustard seeds. Put urid dal.
7. Let mustard seeds splutter. Add slit green chilly, ingh and curry leaves. Add grated gu
8. Wash and remove the water from moong dal and add it to mustard seeds seasoning.


9. Fry nicely for 1 to 2 minutes. Add cut ash gourd pieces, tomatoes and put some water.

10. Pressure cook for 2 to 3 minutes. Let it cool.

11. Put cooked ash gourd - moong mixture. Add salt, turmeric powder and mix it. Add required water and let it boil for 3 to 4 minutes.. Add lemon extract.

12. Shift Ash gourd - moong dal bolu huli /curry to serving bowl. Serve with the main dish you have prepared.

Note : 

Use of pressure cooker is optional. You can cook it separately. Prepare the seasoning and add cooked ingredients and them mix it. Adding any other spices is optional. Adding more chilly is optional. Adding a tablespoon ghee to curry is optional. It adds to the taste.
Time 30 Minutes.
Serves : 3 to 4.

Monday, October 22, 2018

Huttari Genasu Curry

Huttari Genasu is a type of root vegetable You get in Coorg. It is like Suvarna Gedde / Elephant foot.

Huttari Genasu has a special quality that it does not itch while cutting where as Suvarna gedde has that itching nature.
Here I have tried simple curry using Huttari Genasu.
Huttari genasu is cooked during Huttari Habba and I think it is available only during that period. I got this vegetable from our very close friend Usha Suresh Cukkemane. They are from Bhaghamandala near Madikeri. Though they live in Mysore they get these special vegetables from their sisters house who live in Coorg.
I have used Huttari Genasu , moong dal, coconut and some simple spices.

No Onion Or Garlic is used in this Huttari Genasu Curry.

Things needed :

To Cook :
Huttari Genasu : 1 Bowl (1/4 piece of small Huttari Genasu).
Moong Dal : 1/2 Cup
To Grind :
Coconut :  4 to 5 Tablespoons
Jeera /cumin seeds : 1/2 Teaspoon

To Add :
Sambar Powder : 1 Tablespoon
Tamarind : Small Marble size
Salt : As required

Seasoning :
Oil : 1 Teaspoon
Mustard seeds : 1/2 Teaspoon
Jeera /Cumin Seeds : 1/2 Teaspoon
Curry Leaves : 5 to 6
Ingh / Asafoetida : A pinch.

Method :

1. Wash and remove the outer layer of Huttari Genasu. Wash it again.
2. Cut it into desired size. Big /Small. Pressure cook for  4 to 5 minutes. (Do not over cook).


3. Wash moong dal and cook it separately.

4. Grate coconut and grind it with 1/2 teaspoon of jeera. Soak tamarind and squeeze out the pulp.

5. Keep a pan and add cooked moong dal and huttari genasu. Add salt and a pinch of turmeric powder. Add tamarind pulp.
6. Let it boil for 2 minutes. Add sambar /curry powder and mix it well.


7. Add ground coconut. Mix it well and let it boil for 3 to 4 minutes.


8. Shift the ready Huttari Genasu Curry to a serving dish.
9. Add mustard seeds, curry leaves and ingh / asafoetida seasoning.


10. Serve with the main dish you have prepared.

Note :


Clean the vegetable nicely so that no mud will get into the curry. Cut the vegetable and then wash it again. Adding coconut to the curry is optional. You can cook this curry without coconut also.
Adding any spice powder is optional. I have used home prepared sambar powder.
Huttari Genasu is one of the vegetable you get during Huttari habba. It has a special quality that it does not itch while cutting or cooked. Adding onions or garlic is optional.
Time : 30 Minutes.
Serves : 3 to 4. 

Saturday, October 20, 2018

Millet Mirchi Bajji /Fried Fritters

Mirchi bajji is famous fried fritters these days. Mirchi bajji goes well with a cup of coffee/chai or any other fruit juice.

I have tried this Mirchi bajji using millet flour, besan /channa dal flour, curry leaves chutney powder and other spices. Just wanted to try this fritter with millet flour and it has turned nicely with crispy and soft texture. It has a good taste and of course it is a good choice for having with lunch as a bite by the side.
Let us see the reciepe Now :

Things needed :

Mirchi /Bajji Chilli : 3 to 4
Millet flour : 2 to 3 Tablespoons
Besan / Channa Dal Flour : 2 to 3 Tablespoons
Curry Leaves Chutney Powder : 1 Tablespoon
Chilly powder : 1/2 Teaspoon
Jeera / Cumin Seeds : 1/2 Teaspoon
Salt : As required
Oil : to Fry : 1 Cup

Method :

1. Wash and remove the seeds in Chilly. Slit them in the middle. / You can cut them into two in the middle.
2. Take a big bowl and add millet flour, besan / channa flour, curry leaves chutney powder, salt, chilly powder and jeera/cumin seeds. Mix it well.
3. Add water and prepare the batter. ( Let it be medium thick).


4. Keep a pan on the fire and heat. Add a cup of oil. Let it get hot.
5. Dip each chilly in the batter you have prepared and fry them on medium flame.


6. Turn the other side and fry till they turn golden brown.

7. Remove from the oil and put it on a kitchen tissue.


8. Millet Mirchi Bajji /Fried fritter is ready to serve.


9.Repeat the same and prepare the remaining bajji.
10 Serve as you wish, with a cup of coffee / tea or a cup of juice or for lunch as a bite like papad.


Note :

Careful while you prepare the batter. Let the batter be medium thick. Adding any spice is optional. Curry leaves chutney powder adds to the taste. Adding more chilly powder is optional.
Fry on medium flame so that it cooks well and chilly turns crunchy.
I have the big chilly into two. So that it is easy to fry. No cooking soda is used here.
Time : 20 Minutes.
Serves : 2 to 3.

Tuesday, October 9, 2018

Capsicum - Cow peas Dry curry

Capsicum - Cow Peas Dry Curry is something simple, easy and quick. You can have this curry with many main dishes. I have just tried and its so simple.


I have used fresh cow peas, manalore cucumber and capsicum.
No onion or No garlic is added here in this curry. 
Let us see the recipe Now :

Ingredients :

Cow Peas : 1 Bowl.
Mangalore Cucumber/Mangalore Southekai / Bannada Southekai : 1 Bowl ( 1/2 of 1 medium size)
Green chilly : 2 to 3
Ginger : 1 Teaspoon / Grated
Salt : As required
Lemon : 1/2 Lemon (1 Teaspoon)
Pepper Pods : 6 to 8
Jeera / Cumin Powder : 1/2 Teaspoon
To Season :
Capsicum : 1
Oil : 1 Tablespoon
Mustard seeds : 1/2 Teaspoon
Jeera /Cumin Seeds : 1/2 Teaspoon
Ingh/Asafoetida : A pinch
Curry Leaves : 6 to 8 leaves
To Add : 
Coriander Leaves : 2 Tablespoons
Fresh Grated Coconut : 2 to 3 Tablespoons

Method :

1. Wash and cut mangalore cucumber into small pieces.
2. Now pressure cook  cut cucumber, a bowl of fresh cow peas, pepper pods and 1 Green chilly with required water. (1/4 cup will do).


3. Wash and remove the seeds from capsicum and cut it into small. Slit green chilly and cut coriander leaves. Squeeze out lemon extract and keep it aside.


4. Keep a small pan on the fire and heat. Add a tablespoon of oil. Add mustard seeds and jeera.
5. Let mustard seeds splutter. Add curry leaves, slit chilly and ingh. Fry nicely and add cut capsicum.
6. Fry capsicum nicely till soft on low flame. Put this fried capsicum to cooked cow peas mixture.


7. Keep cooked mixtures in a pan and put salt, little turmeric powder and jeera powder. Mix all the ingredients nicely and cook for 2 minutes. Let all the moisture disappear. Add lemon and mix it well.


8. Put off the fire and shift ready Capsicum - Cow peas curry to a serving dish.


9. Add fresh grated coconut and serve with main dish you have prepared.


10 We had Capsicum - Cow Peas Dry Curry with Plain Rice and Rasam.


Note :

Do not over cook cow peas. Do not add much water while cooking. Adding any type masala is optional. Use of coconut is optional. Use of onions and garlic is optional. Use of more oil is optional.
Time 20 Minutes
Serves : 3 to 4 .

Monday, October 1, 2018

Raw Tomato - Fresh Cow Peas Curry

Tomatoes are good to have in our cooking. It is good to see our home garden is giving out so much tomatoes. This time it is green tomato curry done with these Green Tomatoes. Fresh cow peas is also available plenty in market.
I have used green raw tomatoes and cow peas for this curry. Fresh aromatic spice is prepared and used for this Curry.
Let us see the recipe now :

Things Needed :

Raw Tomatoes : 10 to 12
Fresh cow peas : 1 Bowl.
Coconut : fresh and grated : 2 to 3 Tablespoons.
Fresh spice powder : 2 Tablespoons
Salt : As required
Coriander leaves  : 2 Tablespoons
For Seasoning :
Oil : 1 Tablespoon
Mustard seeds : 1/2 Teaspoon
Jeera : Cumin Seeds : 1/2 Teaspoon
Ingh : Asafoetida : A little
Curry Leaves : 5 to 6
Green Chilly : 1 or 2

Method :

1. Wash and cut tomatoes into small pieces. Wash and pressure cook cow peas for 3 to 4 minutes.
2. Wash and cut curry leaves, coriander leaves and slit green chilly.


3. Grate coconut and keep it aside.
4. Keep a pan on the fire and heat. Add oil and mustard seeds  and jeera.
5. Let mustard seeds splutter.
6. Add curry leaves, ingh and slit green chilly.

7. Stir once and put cut tomatoes. Fry them on low flame. Add cooked cow peas and stir slowly/
8. Add turmeric powder, a teaspoon of jaggery.

9. Let it cook soft. Add salt and mix it well.
10. Add spice powder and mix all the ingredients nicely.
11. Let all the moisture disappear. Add Fresh grated coconut.


12. Shift the curry to a serving dish and mix it with coriander leaves. Raw Tomato - Fresh Cow Peas curry is ready to serve.

Note : 

Do not add while cooking tomatoes. It will be cooked soft with its moisture. Adding any spice powder is optional. Adding little garam masala adds to the taste. No onion or garlic is used here.
Adding more / less oil is optional. Use of coconut is optional.
Time : 15 Minutes.
Serves : 3 to 4
Special Spice powder :

Ingredients:

2 Tablespoons of coriander seeds, 1/2 teaspoon of cumin seeds, 1 teaspoon of channa dal, 1 teaspoon of urid dal, ingh, 2 cloves,  a very small piece of cinnamon, handful of curry leaves and a pinch of ingh.
Dry roast all the above ingredients on low flame one by one and powder it once it is cooled. 

Jack fruits Seeds Tikki

Jack fruits are healthy Seasonal fruits. The seeds also contain lots of good vitamins and minerals.  After eating the fruit we throw away th...

About

author
My name is Nalini Somayaji. Teaching is my profession. Cooking is my passion. Reading, travelling, visiting new places, having fun with kids are some of the hobbies I can say. My recipes are Healthy, quick, easy and simple. Grown up being a traditional family member I love and respect Indian culture and traditions. Love classical dance and music.
Learn More →