Thursday, January 11, 2018

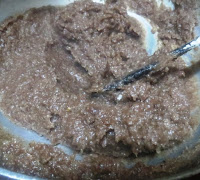
Bottle Gourd Peel Chutney

Bottle Gourd is known as one of the healthy vegetable. It is filled with fiber, minerals and vitamins.
I have prepared bottle gourd peel chutney and is very simple and yummy. It can be one of the side dish when you have lunch, dosa, idli, roti or chapatis.


We do prepare mangalore cucumber peel chutney and I have adopted the same method to prepare this bottle gourd chutney.
I have used Bottle Gourd peel, coconut, fried urid dal and red chilly.
Let us see the recipe Now :
No Onion or No Garlic is used in this : " Bottle Gourd Peel Chutney "

Ingredients :

To Fry :
Urid dal : 1 Tablespoon
Methi seeds 1/4 Teaspoon
Coriander seeds : 1/2 Teaspoon
Curry leaves : 6 to 8 or little more
Ingh /Asafoetida : A littel
Bottle gourd peel : 1 Small bowl.
To Grind :
Fresh Grated coconut : 1 Cup
Tamarind : 1 Marble size ( Tamarind pulp is used)
Fried dal mixture
To Season :
Coconut Oil : 1 Teaspoon
Mustard seeds : 1/2 Teaspoon
Curry Leaves : 4 to 5
Ingh /Asafoetida : A pinch
To Add : Salt : As required
Required water

Method :

1. Wash Bottle gourd nicely and dip in water for at least 20 minutes.
2. Peel off the outer layer and keep it aside.

3. Grate coconut and soak a marble size of tamarind in warm water for 5 minutes. Squeeze out the pulp. Keep it aside.

4. Wash curry leaves and keep it aside.
5. Keep a pan on the fire and heat. Add a teaspoon of coconut oil and put methi seeds.
6. Add urid dal and fry till methi seeds and urid dal turn light golden brown.


7. Add coriander seeds and red chilly. Fry for 1 to 2 minutes on low flame.
8. Add curry leaves and ingh. Add bottle gourd peels and fry nicely for 3 to 4 minutes

9. Put off the fire and add grated coconut and mix all the ingredients nicely.
10. Let it cool. Grind the fried mixture with coconut and tamarind extract. (Pulp extract).
11. Add salt and churn it for a second. Remove the chutney to a serving dish.


12. Add mustard seeds, curry leaves and ingh/asafoetida seasoning to chutney and serve.

Note:

Frying the ingredients on low flame adds to the taste. You can cook bottle gourd peel with little coriander seeds and tamarind and use it. Turns soft and nice. Frying urid dal is a must if you want to add urid or any other dals. Example : Toor dal, channa dal, Horse gram etc. Use of more/less chilly is optional.
Time : 20 Minutes
Serves : 3 to 4 .
Type : South Indian Chutneys

Wednesday, January 10, 2018

Little Millet Lemon Rice/Same Chitranna

Millets are known as healthy grains these days because of their health benefits. They are rich in fiber, free of gluten and keeps you in good health. I have used little millet and prepared lemon rice.
Little millet is known as Same akki in Kannada language/Karnataka/India. 


I have used Little millet, lemon, coconut and green chilly.
Let us see some benefits of using "Lemon" in our diet.
Lemon is known for its healthy properites. It is a good blood purifier, contain antioxidants, and helps in good digestion. It helps in treating indigestion, constipation, throat infections, fever and obesity. It also helps in treating respiratory disorders, cholera and high blood pressure. They do take care of our skin and helps in strengthening our bones, immune system and cleanse our stomach. Lemon juice is helpful in treating kidney stones and lowering body temperature. They have vitamins like vitamin C, Vitamin B6, vitamin A, Vitamin E and minerals like copper, calcium, iron, magnesium, potassium, zinc, phosphorus and protein.
Let us see the recipe Now :
No Onion or No Garlic is used in this recipe.

Thing Needed :

To Cook :
Little Millet : 2 Cups
Water : 4 Cups
To Season :
Coconut Oil : 1 Tablespoon
Mustard seeds : 1 Teaspoon
Urid dal : 1 Teaspoon
Curry leaves : 6 to 8
Green chilly : 3 to 4
To Add :
Grated coconut : 1 Cup
Grated ginger : 1 Teaspoon
Salt : As required
Ghee : 1 Tablespoon
Turmeric Powder : A pinch
Cashew Nuts : 6 to 8 (Optional)
Lemon : 1
Coriander leaves : 2 to 3 Tablespoons.

Method :

1. Clean wash and cook little millet in pressure cooker. Leave it for cooling.

2. Wash and cut green chilly, curry leaves and coriander leaves.
3. Wash and remove the outer layer of ginger and grate it.
4. Grate coconut and keep it aside. Extract lemon and keep the juice aside.

5. Keep a pan on the fire and heat. Add coconut oil, mustard seeds and urid dal.
6. Let mustard seeds splutter. Add slit green chilly and curry leaves.

7. Add cooled little millet and mix it slowly.
8. Add turmeric powder, ghee, lemon juice and mix it nicely. Let the flame be on low.

9. Add grated coconut and  fried cashew nuts. ( Fry it in a teaspoon of coconut oil).

10. Shift the ready Little millet lemon rice to a serving dish. Serve with a cup of curd.

Note :

Do not add more water. It might turn watery and the lemon rice does not taste good. Use the exact required water. ( The ratio is 1 : 2 - one cup millet and 2 cups of water).
Adding onions or garlic is optional. You can use more/less chilly. Use of any cooking oil is optional.
Adding fresh coconut is optional.
Time : 30 Minutes
Serves : 3 to 4.

Saturday, January 6, 2018

Easy Avalakki

Avalakki/Poha/Aval is a handy ingredients and you can do varieties of dishes. I have tried this easy avalakki and it is nice to have it at any time of the day.


I have used very simple ingredients like Avalakki (organic and brown/not removed the husk completely or unpolished). Ground nuts, green chilly and little coconut.
It is an easy dish and goes well with a cup of coffee/tea/juice or it can be eaten with curd.
It is good to take for travel too.
Let us see the recipe now :

Things Needed :

Avalakki/Poha/Aval : Thin variety : 2 Cups
Green chilly : 1
Roasted chenna/Hurikadale : 1 Tablespoon
Ground Nuts : 2 to 3 Tablespoons
Coconut Oil : 1 Tablespoon
Mustard seeds : 1/2 Teaspoon
Urid dal : 1/2 Teaspoon
Salt : As required
Coconut /Dry coconut/Copra : 2 to 3 Tablespoons

Method : 

1. Clean avalakki and keep it aside.
2. Grate coconut and keep it aside.
3. Wash curry leaves and green chilly , cut into small and keep it aside.
4. Now keep a pan on the fire and heat. Add oil, mustard seeds and urid dal.
5. Let mustard seeds splutter. Add curry leaves and cut green chilly. Fry for a while.
6. Add ground nuts and fry till they turn golden brown. Add roasted chenna and stir once, add avalakki fry for 1 minute.


7. Put off the gas, add required salt and let the fried avalakki stay in pan till it turns cool.

8. Add grated fresh coconut once avalakki is cool and serve with a cup of coffee/tea.

Note : 

You can add little sugar or jaggery while frying avalakki. You can also add a pinch of turmeric powder to the mixture. Adding any other spice like chat masala, garam masala powder or mango powder is optional. You can also add cut onions while serving. (Optional). You can add cut dry coconut if you using this avalakki for travelling.
Time 10 Minutes
Serves : 2 to 3
Tip :Drying avalakki in sun for 1 to 2 days will help the avalakki to stay without any worms or insects.

Friday, January 5, 2018

Carrot Chitranna

Carrot Chitranna is a rice dish and it is very easy to prepare.  Chitranna is Lemon rice and lemon is added at the end it gives a little tangy taste. 


Carrot Lemon is a simple rice dish and you can have them for breakfast who likes to have rice dishes in the morning. It can be eaten for brunch who gets up late and miss breakfast and can combine breakfast and lunch and it is said as brunch. It is good for lunch too. Lazy days or holidays when you want to relax and not much of time to spend in kitchen can plan for this rice. It is also ideal for dinner.
Let us see some benefits of eating Lemon in our diet.
Lemon is used for treating indigestion, constipation, dental problems, throat infections, fever, obesity, respiratory disorders, cholera and high blood pressure. It is also good for hair and skin care. Lemon helps to strengthen our immune system, cleanses our stomach. They are considered as a blood purifier. Lemon is used for treating kidney stones, reducing strokes and lowering body temperature. Lemon juice is one of the best refreshing drink. They are filled with vitamins like vitamin C, Vitamin B6, vitamin A, vitamin E, folate and minerals like copper, calcium, iron, magnesium, potassium, zinc, phosphorus and protein. they are filled with antioxidant properties and it helps in peeventing diabetes, constipation and high blood pressure.
As  I said it is simple, quick and takes very less time to prepare once you cook your rice.
I have used plain rice (Sona Masuri ), lemon, carrots, coconut and green chilly.
Let us see the recipe now :

Ingredients :

Cooked rice : 1 Cup
To Add :
Carrots : 2
Lemon : 1
Coconut : 1 Cup
Coriander leaves : 2 to 3 Tablespoons
Salt : As required
Turmeric powder : A pinch
For Seasoning :
Cooking oil : 1 Tablespoon
Ghee : 2 Tablespoons
Mustard seeds : 1 Teaspoon
Urid dal : 1 Teaspoon
Curry leaves : 6 to 8
Green chilly : 2


Method :

1. Wash and cut green chilly, coriander leaves and curry leaves.
2. Wash and peel off the outer layer of carrots and grate it. Keep it aside.
3. Wash and cut lemon and squeeze out the juice. Keep it aside.
4. Grate coconut and keep it aside.
5. Keep a pan on the fire and put oil. Put mustard seeds and urid dal.
6. Let mustard seeds splutter. Add cut green chilly and curry leaves.
7. Fry nicely for 10 seconds. Add grated carrots and fry nicely for 1 to 2 minutes.
8. Add cooked rice and mix it well. Add salt, turmeric powder and mix it well.
9. Let it cook on low flame for 1 to 2 minutes. Add grated coconut and put off the fire.
11 Add lemon extract (juice) and mix it again. Add 2 tablespoons of ghee and mix it well.
11. Shift the ready " Carrot Chitranna " to a serving dish.
12. Add cut coriander leaves and serve with a cup of curd.

Note : 

Cook rice and cool it before adding to seasoning. Use of any brand of rice is optional. I have used sona masuri and required water ration is 1: 3 ( 1 cup rice and 3 cups of water). Use of green or red chilly is optional. Use of more /less chilly is optional. Use of ghee adds to the taste. Use of onions or garlic is optional.


Time : 20 Minutes if rice is already cooked. Or 20 more minutes to cook rice.
Serves : 2 to 3.
Type : South Indian ..

Wednesday, January 3, 2018

Ragi - Apple Haalubai. (Finger Millet Pudding).

Haalubai (in Kannada Langurage) is one one of the traditional sweet dish/desert.  Normally haalubai is prepared using rice and coconut. I have used Ragi/finger millet instead of rice. Here is a recipe of Ragi/Finger Millet and it is a healthy desert and yummy to have it.


Haalu means milk and this particular sweet dish is prepared using coconut milk and jaggery. Use of coconut is a healthy option and we do get benefit from coconut and coconut milk. It is not only adds taste to the dish you prepare, it adds the healthy properties in it.
Let us see some benefits of having Coconut in our diet.
coconut is referred as Kalpavruksha (means provide the needs of human).
Coconut is one of the wonder food on the earth and it provides multiple health benefits. It helps in lowering cholesterol, healing and stabilizing blood sugar in our body. It is a top immune booster, anti fungal, antibiotic, antiviral and antibacterial remedy for thousands of years. Coconut helps to imporve digestion, stabilize glucose levels, ward off wrinkles, build cells, regulate hormones, fight infections and good for weight loss. Coconut is highly nutritious and rich in fibre. It has vitamin C, E, B1, B3, B5 and B6 in it. It has minerals like iron, sodium, calcium, magnesium and phosphorous.
 Ragi - Apple Haalubai can be eaten as desert, for kids snack box, breakfast, travelling and kitty parties.
I have used ragi flour, apple, jaggery, cardamom, cinnamon (very little) and some ghee.
Let us see the recipe now.

Things needed :

Ragi flour : 2 Cups
Jaggery : 3/4 Cup or little more
Apple : 1 (big size)
Ghee : 3 to 4 Tablespoons
Cinnamon : Very small pieces.( 1/3 of an inch)
Cardamom : 6 to 8 Pods
Salt : A pinch
Coconut : 1 Cup

Method :

1. Grate coconut and grind it nicely with cinnamon and cardamom seeds. (Remove the seeds from the pods and then use it). Let it be paste consistency.

2. Dry roast ragi flour for 2 to 3 minutes on low flame and let it cool.
3. Keep a pan on the fire and heat. Put jaggery and 1 glass of water. Let jaggery melt completely and starts to boil. Remove from the pan and sieve it.


4. Wash and remove outer peel of an apple. Remove the seeds and hard portion. Cut them into very small pieces.
5. Keep a pan on the fire and add sieved jaggery and ground coconut mixture.
6. Add roasted ragi flour to jaggery mixture and slowly stir. Let it mix well.


7. Keep on stirring till it turn slightly thick. Add a tablespoon of ghee and keep stirring the pudding.


8. Add little ghee in between and stir the haalubai on low flame. It starts to leave the edges of the pan.
9. Add cut apple pieces and let it mix it with ragi coconut mixture nicely. Add little ghee.

10. Stir for another 5 to 8 minutes and pour the dough to a ghee greased tray or plate.


11 Spread it evenly on the plate. Cut it once it is cooled.

12. Serve or eat whenever you want to. Add little ghee on the top of Ragi - Apple Haalubai just before serving.

Note;

You can add grated apple instead of pieces. I have added the pieces so that you get a piece while eating haalubai. Adding more ghee is optional. (Remember it does not take much ghee). Use of oil instead of ghee is optional. Taste differ and ghee taste better. Adding any other flavour instead of cinnamon and cardamom is optional. Adding more jaggery is optional.
Time : 30 Minutes.
Serves : 25 to 30 pieces. (According to size and shape).
Type : Desert/Sweet/Indian.

Jack fruits Seeds Tikki

Jack fruits are healthy Seasonal fruits. The seeds also contain lots of good vitamins and minerals.  After eating the fruit we throw away th...

About

author
My name is Nalini Somayaji. Teaching is my profession. Cooking is my passion. Reading, travelling, visiting new places, having fun with kids are some of the hobbies I can say. My recipes are Healthy, quick, easy and simple. Grown up being a traditional family member I love and respect Indian culture and traditions. Love classical dance and music.
Learn More →