Showing posts with label Yum Yum. Show all posts

Friday, November 11, 2016

Avarekalu (Field Beans) Jeera Curry

Avarekalu (Field beans) already in the market. So that means every dish goes with Avarekai here in Karnataka. Until the crop gets over  (till end of February), its the Avare Kai Season. Avarekai rotti, Avarekai Dose, Avarekai Idli, Avarekai Vada, Avarekai bisibel bath, Avarekai Vanghi bath, Avarekai saaru/Sambar/saagu/ Kootu, Avarekai kodubale, fried crispy avarekai etc etc etc. Every thing is Avaremaya means all things are with Avarekai.
I have prepared Avarekai Saagu/Kootu/ Jeera Huli.


Lets see some benefits of eating Avarekai/Flat beans in our diet.
Field beans/Avarekai contain Vitamin A, B and C. They are highly nutritious and supply vital nutrients to our body. Field Beans do contain high fiber and regulates cholesterol level in our body. They do help the digestive system function well. They are rich source of iron and it is very important in building good blood cells. (Hemoglobin).
Lets see the recipe now: No Onions OR No Garlic is used in this Avarekai Jeera Curry 

Ingredients : 

To Cook :
Avarekai/Field beans : 2 Cups
Methi/Fenugrik seeds : 1/2 Teaspoon
Moong Dal : 2 Tablespoons
To Grind :
Jeera/ Cumin Seeds : 1 Teaspoon
Coconut : 1/2 Cup
Green chilly : 2
Ginger : Half inch
Tamarind : Small marble size
Add :
Bajji Chilly Pakoda chilly : 2 to 3
Green/Red Tomatoes : 2 to 3 ( Very small ones).
Turmeric Powder : 1/4 Teaspoon
Mustard seasoning :
Ground coconut mixture
Cinnamon : very small piece
Cloves : 1 to 2
Coriander Leaves : 2 Tablespoons (Optional)

Method :

1. Remove the seeds from Fresh Field beans and wash it.

2. Wash green tomatoes, bajji chilly (Pakoda chilly, green chilly and and cut it in to small. Remove the seeds from pakoda chilly before cutting into small.

3.Wash moong dal and keep it aside.
4. Now keep a pan on the fire and heat. Add a teaspoon of oil. Add cinnamon and clove.
5. Add Avarekai/Field beans, moong dal, turmeric powder and methi seeds. Mix it well.
6.. Cook with required water. ( I have used pressure cooker to cook).

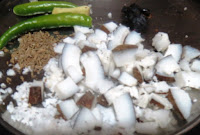
7. Grate or cut coconut into small pieces and grind with jeera, green chilly, ginger and tamarind. (Use required water).
8. Remove the ground mixture from the mixi jar and keep it aside.
9. Now keep a pan on the fire and put cooked field beans and vegetables.
10. Add Pakoda/Bajji Chill, cut tomatoes and mix it well.

11. Add salt and ground mixture and mix it well. Let it cook for 3 to 4 minutes.

12. Shift the ready curry to a serving bowl and add mustard seasoning.

Note :

Do not add much cinnamon and clove.
Let the aroma be mild. Removing the seeds from Pakoda chilly reduce the spice (hot) of the chilly. Adding more spice and green chilly is optional.
Adding onions and garlic is optional.
Adding cinnamon and clove is optional. You can use any choice of your choice. Eg : garam masala powder or any other spices.
Time : 30 Minutes
Servings : 4 to 5  

Monday, November 7, 2016

Khadi Pakoda

Khadi Pakoda is a special dish of Punjab, Gujarath and Rajastan. Here I have tried this Yummy curry with my style.

Khadi means curry made of butter milk and besan and pakodas are with simply besan and coriander leaves and spices. Onion Pakodas are also dipped in Khadi and enjoyed it thoroughly with Hot Rice, Palau or Rotis. 
I have seen one of our friend from Delhi who is an expert cook and ideal home maker. Mrs. Gupta done most of the dishes with yummy taste and with out onions. They belong to Baniyas group and have loads of customs and traditions. We knew them from Nigeria and they too shifted to Dubai like us. Mr. Gupta was a Maths lecturer and Mrs. Gupta a beautiful home maker. I have eaten Khadi Pakoda many times in their house. I was just watching her making Khadi Pakoda. I was not that interested because I never liked curd or butter milk those days.
I just thought of that now and tried this recipe. Luckily I had some butter milk which I got from the process of making butter. 
Not much of spices added here and it is very mild. First prepare the Khadi and then prepare pakodas and dip them in the khadi for at least 10 minutes and then serve with the main dish of your choice.
Lets see the recipe Now: Always make it simple when you cook. It helps you to enjoy your cooking.
No Garlic or No Onion is added in this Khadi Pakoda. 

1. Khadi Preparation :

Things Needed :
Butter Milk : 1 Bowl (At least 2 to 3 cups of butter milk)
Besan/Kadale Hittu/Channa flour : 1 teaspoon full
Salt : As required 
Red chilly : 2
Green chilly : 2 
Jeera /Cumin Seeds : 1/2 Teaspoon
Ingh/Asafoetida : a pinch
Turmeric powder : a little
Ginger : An inch 
Method :
1. Wash and remove the outer layer of ginger and wash it again. Great it and keep it aside.
2. Wash coriander leaves, curry leaves, green chilly and slit green chilly. 
3. Take a bowl and add a spoon of besan. Add 1/4 cup of water and mix it well. Keep it aside.

4. Keep a big pan on the fire and heat. Put oil, jeera and let it fry for 10 seconds.
5. Add red chilly and slit green chilly. Fry a little and add curry leaves and ingh.

6. Add buttermilk/majjige and mix it nicely. Add required salt. Add ginger. 
7. Add the besan (which is already mixed and kept) and mix it nicely. 
8. Keep stirring so that it does not get burnt at the bottom. Let it boil for 3 to 4 minutes.

9. Let it be on low flame for 2 more minutes. Stir in between.
10. Shift the ready Khadi to a serving bowl. 

Pakodas :

Things Needed :
Bottle Gourd : 1/2 of  1 Bottel Gourd 
Bean/Channa flour : 3 to 4 Tablespoons 
Chilly Powder : 1/2 Teaspoon
Jeera/ Cumin Seeds : 1/2 Teaspoon
Coriander leaves : 1 Tablespoon
Salt : As required 
Oil to Fry : 1 Small Cup
Method :
1. Wash and remove the outer layer of bottle gourd/sorekai and grate it.
2. Put bottle gourd gratings in a big bowl.

3. Add besan, chilly powder, jeera, salt and cut coriander leaves.
4. Mix it nicely and prepare the dough. Do not add any water. Bottle gourd helps the flour to bind nicely.

5. Keep a frying pan on the fire and heat. Add oil. Let it be hot. (Medium flame).
6. Now take a small portion of dough and leave the dough little by little in oil. 

7. Let it fry on both sides. ( Turn the other side and cook till they turn golden brown).
8. Remove the pakodas and put them on a kitchen tissue. 

9. Repeat the same and prepare all pakodas. 
10. Put the fried pakodas in ready khadi and leave it for 10 minutes and then serve. Add little coriander leaves before serving. 

Note : 

Adding any spice is optional. (Even for Khadi). You can add a clove and cinnamon piece. Adding onions or garlic is optional. (I have not added). Do not add water to pakoda dough. The batter turns loose and absorb more oil. You can use onions instead of bottle gourd gratings. (Optional). You can add more/less chilly according to your taste. You can dilute curd and make butter milk if you do not have butter milk. (Add 1 to 1 1/2 cup of water to 1 cup of curd and churn in the mixi for 2 minutes. Your butter milk is ready to use. Adding garam masala/chat masala to the curry and pakoda is optional. (I have not added).
Time : 40 Minutes 
Serves : 4 to 5 

Friday, November 4, 2016

Kempu Harive -Kesu dantu Huli (Red Amarant - Colocasia stem curry)

Kempu Harive/Red Amaranth leaves and - Kesu (Colocasia leaves) Dantu (stem) curry is a side dish and it goes well with all the main dishes like plain rice, any type of rotis, poori or chapati, dosa - idli etc.

I have used Amaranth leaves, Colocasia stems, some spices and coconut. It is an traditional gravy and you will surely love it. If you do not want to use colocasia stem, then substitute with drum sticks or any leaves which have hard stem like dantina soppu.
Let us see some benefits of eating Amaranth Leaves in our diet.
Kempu Harive/Red Amaranth leaves are loaded with healthy benefits. They help to stimulate the growth and reduce the inflammation. They boost bone strength and lower blood pressure. Improve our immune system and maintain healthy hair. Helps to lose weight. They are loaded with proteins and antioxidant properties. It is good for digestion and it is gluten free. It helps in good eye sight because it has Vitamin A helps to boost the eye health. Amaranth Leaves contain Vitamin A, Vitamin C, Vitamin K and Folate (A type of Vitamin B which is essential for growth and reproduction of the cell). and minerals like manganese, magnesium, calcium and potassium. Amaranth leaves are low in fat and carbohydrates and calories.
" NO ONION OR GARLIC" is used in Kempu Harive  - Kesu Dantu Huli. The spices are used as raw and not roasted.
Lets see the recipe :

Things Needed : 

To Cook:
Toor Dal : 1/2 Cup ( 2 Handful )
Kempu Harive/Red Amaranth Leaves : 1 Bundle (Small bundle).
Kesu Dantu/Colocasia stems : 1 Big Bowl
Tamarind : 1 small goose berry size (Nelli kai)
Salt : Required Salt :
To Grind : 
Coconut : 1 Cup (Fresh)
Coriander Seeds : 2 Tablespoons
Jeera/Cumin Seeds : 1/2 Teaspoon
Red Chilly (Byadagi) : 4 to 5
To Add : 
Ground spice mixture
Mustard seasoning
Green chilly : 2 to 3
Ingh/Asafoetida

Method :

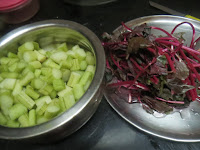
1. Wash and cut Amaranth leaves into small and keep it aside.

2. Wash and remove the outer part of Kesu stem and cut them into small and keep it aside.

3. Wash and cook Toor dal separately and let it cool.
4. Put cut amarant leaves, kesu stem pieces, tamarind pulp and salt to a big pan or pressure cooker.
5. Add 1/2 cup of water and cook them till they turn soft. (Pressure cooker : 4 to 5 whistles). Put green chilly as they are. ( No need to cut or slit).

6. Grate coconut and grind it with chilly, coriander seeds and jeera. Use required water to grind.

7. Now add cooked dal to cooked leaves mixture and mix it nicely. Cook for a minute.
8. Add a pinch of turmeric powder and ground spice mixture. Mix it well. Cook for 2 to 3 minutes.

9. Shift the Huli/Curry to a serving bowl. Add mustard seasoning. (Optional).


10. Serve with the main dish you have prepared.

Note :

Adding tamarind pulp helps the kesu stem not to itch. Leaves and stems should be cooked till soft.
Adding any sambar powder instead of raw spices is optional. Adding onion/garlic to the curry is optional. Adding jaggery is optional. I have not added.  The consistency of the curry taste better when it is thick. (Adding little water and turn the curry bit loose if you do not like the thick curry). Use of pressure cooker to cook leaves and stems it better because it turns them soft. (Not fully melted).
Time : 30 Minutes
Serves : 4 to 5 

Friday, August 19, 2016

Banana - Jaggery Wheat Poori

Banana Jaggery Poori is a fried dish and you can have them for breakfast and as snack. 


Mangalore buns world famous and is normally prepared using maida (All purpose flour) and sugar with cooking soda.
Lets see some benefits of using coconut oil in our diet.
Coconut oil is loaded with health benefits. It is good for digestion and immunity against infections and diseases. It is good for skin care, hair care and prevents diseases like premature aging because of it antioxidant properties. It also helps to treat dermatitis, eczema and other skin infections
It helps to prevent wrinkles, dragging skin and skin dryness. It helps to reduce the protein loss in the hair and nourishes the hair. Coconut oil helps to improve the bone health. Strengthen the immune system. It is also good for healing damaged tissues and infections.
Here I have used wheat flour instead of maida and used jaggery/joni bella as we call it. You don't need to keep the dough for resting. You can prepare the poories as soon as you prepare the dough.
These sweet poories are good to take it for outings, for kids snack box and even kids parties.

Things Needed : 

Wheat flour : 2 Cups
Ghee : 1 Teaspoon
Bananas : 2 to 3
Jaggery : 2 to 3 Tablespoons
Cooking Soda/Bicarbonate soda : A pinch
Curd/Yogurt : 1 Tablespoon
Salt : A pinch
Oil : To fry. : 1 Cup

Method :

1. Smash banana nicely. Add jaggery and curd. Mix all the ingredients nicely.
2. Now add wheat flour,salt and a teaspoon of ghee. Mix it nicely.

3. Add cooking soda to the dough and mix it well. Divide the dough into small portion.
4. Keep oil for frying. Let it heat.
5. Roll or pat the small portion on your pal. ( As small poories)
6. Fry them one by one on both side (Medium heat).
7. Remove it from oil and put them on the kitchen towel. (Let all the extra oil absorb by tissue).
8. Repeat the same with remaining dough.
9. Serve with a cup of coffee or tea.

Note : 

Do not add any water to the dough. The dough should be thick. Add little more wheat flour if the dough turns soft and saggy. Apply little oil to the palm and pat the dough on the palm. Adding more jaggery is optional. You can powder jaggery and then mix it with banana and curd to turn soft and nice mixture. Use of any cooking oil is optional. (Coconut, sunflower, groundnuts etc).
Time : 30 Minutes.
20 Small pooris can be prepared. (According to the size). 

Jack fruits Seeds Tikki

Jack fruits are healthy Seasonal fruits. The seeds also contain lots of good vitamins and minerals.  After eating the fruit we throw away th...

About

author
My name is Nalini Somayaji. Teaching is my profession. Cooking is my passion. Reading, travelling, visiting new places, having fun with kids are some of the hobbies I can say. My recipes are Healthy, quick, easy and simple. Grown up being a traditional family member I love and respect Indian culture and traditions. Love classical dance and music.
Learn More →