Showing posts with label Quick. Show all posts

Sunday, November 18, 2018

Brinjal Gojju

Brinjal Gojju / bartha is a side dish done with Brinjal/Egg plant. The big brinjal really adds taste to this curry.

It is a quick, easy, yummy and simple dish that you can prepare when you are in a hurry.
Brinjal Gojju goes well with almost all the main dishes.
Let us see the recipe now :
No Onion OR No Garlic is used in Brinjal Gojju.

Ingredients :

To cook :

Brinjal  : 1
Green chilly : 2
Tomatoes: 2 ( Small )
Capsicum : 1
Carrot : 1
Ginger : An inch
To Season :
Coconut Oil : 2 Tablespoons
Mustard Seeds : 1/2 Teaspoon
Jeera / Cumin Seeds : 1/2 Teaspoon
Ingh /Asafoetida : A pinch
Curry Leaves : 6 to 8 leaves
To Add :
Turmeric powder : A pinch
Sambar /Rasam Powder : 1 Tablespoon
Salt : As required
Jaggery : 1 Teaspoon
Coriander leaves : 1 Tablespoon

Method :

1. Wash and cut brinjal and soak the pieces in a big bowl at least for 10 minues.
2. Wash and cut tomatoes, carrot and slit green chilly.
3. Wash and cut capsicum and keep it aside.


4. Wash ginger, peel of the skin and wash it again. Grate it and keep it aside.
5. Keep a pan on the fire and put oil. Add mustard seeds, jeera and let mustard splutter.
6. Add ingh, curry leaves and fry for a second.

7. Add cut carrot pieces, capsicum, and tomatoes. Add grated ginger and green chilly.


8. Fry nicely for s minute. Remove brinjal from water and wash it again. Add these brinjal pieces with carrots.
9. Fry for a minute and add salt, turmeric powder, rasam powder and salt.
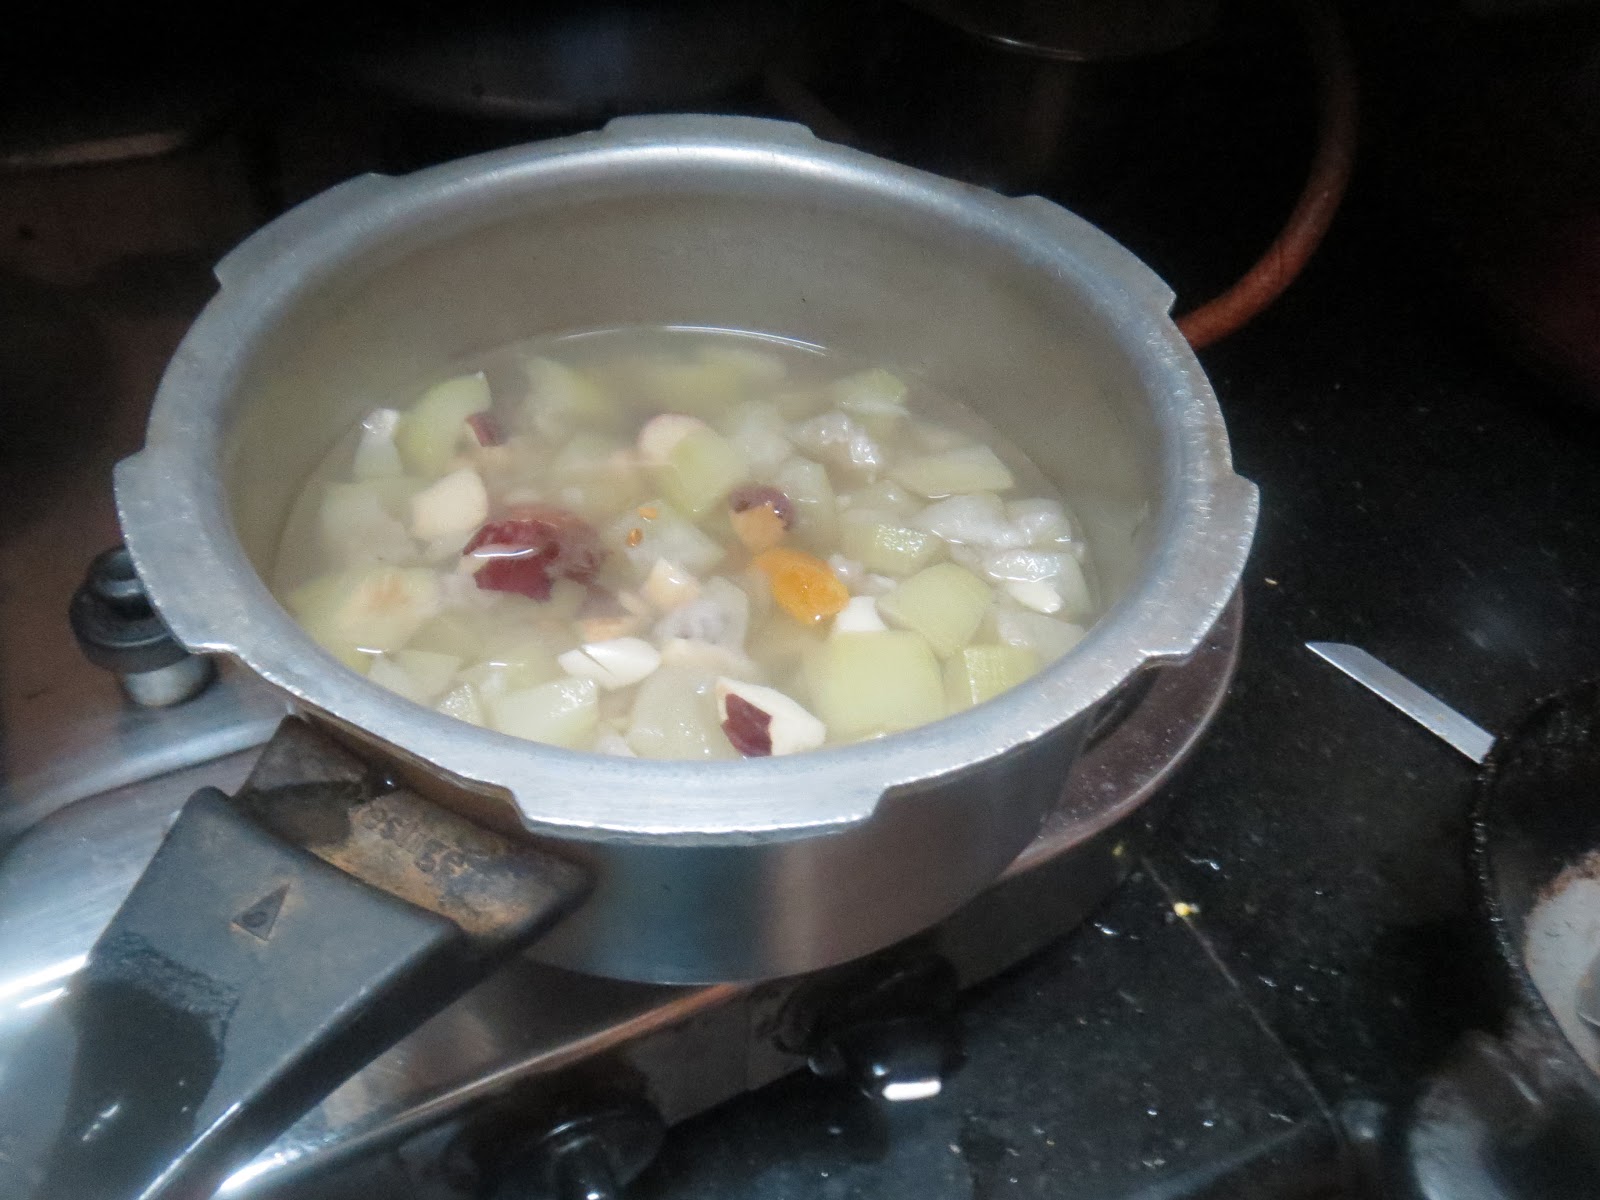
10. Mix all the vegetables nicely and put 1/2 cup of water and cook for 4 to 5 minutes. ( I used pressure cooker to cook ). Allow it to cool.
11. Keep the cooked gojju on the fire. Add jaggery and mix it well. Add coriander leaves.


12. Shift the ready Brinjal Gojju to a serving dish and serve with the main dish you have prepared. We had it with plain red rice.

Note :

Soaking brinjal pieces in water helps to remove the bitterness in brinjal. Use of any brand of
 rasam /sambar powder is optional. I have used MTR. rasam powder.
Use of any cooking oil is optional. You can use tamarind pulp instead of tomatoes.
Discarding tomato seeds is optional. Use of pressure cooker is optional. You can cook in a pan instead of pressure cooker. Use of onions and garlic is optional.
Time : 20 Minutes.
Serves : 3 to 5.
Brinjal Bajji/Fried fritter with Brinjal Gojju.
 Mix channa flour with little water, jeera, chilly powder and salt. Let the batter be idly consistency.
Wash and cut brinjal in to circle shape and wash it again. Squeeze out the water and dip brinjal pieces in channa batter. Keep a cup of oil on the fire and heat. Fry channa flour dipped brinjal one by one in hot oil. Remove from the oil and put it on the kitchen tissue.
Serve as one of the side dish.


Sunday, October 28, 2018

Carrot - Capsicum Chutney

Carrot Capsicum Chutney /dip is a simple side dish and it goes well with dosa, idli, upma , plain rice and all types of rotis and naan. It can be used as dip for bajji /fried fritter or can use it for bread sandwich.

It is an easy dish and good for all age group.
Eating fresh coconut is good for health. It helps to keep our skin soft and smooth.
Let us see the recipe now :

Things Needed :

Capsicum : 1 (Medium size)
Carrot : 1 ( Big )
Green chilly : 2 to 3
Fresh grated coconut : 1 Bowl
Tamarind : 1 Small Marble size
Ginger : An inch.
Methi seeds/Fenugrik seeds : 1/4 Teaspoon
Pepper Pods : 3 to 4
Salt : As required
For seasoning :
Coconut Oil : 1 Teaspoon
Mustard seeds : 1/2 Teaspoon
Ingh/Asafoetida : A little
Curry Leaves : 5 to 6

Method :

1. Wash and remove the seeds from capsicum and cut into small pieces.
2. Wash and scrape out the outer layer of carrots and cut into small.
3. Wash and slit green chilly and keep it aside. Wash and remove the outer layer of ginger and wash it again.
4. Wash curry leaves and keep it aside. Grate coconut and keep it aside.


5. Keep a pan on the fire and heat. Add coconut oil, pepper pods and methi seeds. Fry till they turn golden brown.
6. Add cut carrots, capsicum, ginger and chilly.. Fry for 1 to 2 minutes.
7. Put off the fire and add grated coconut and tamarind.

8. Grind it with required water and salt. ( Add water little by little).
9. Grind it til it turn as required consistency and remove from the mixi jar.


10. Add coconut oil, mustard seeds, ingh and curry leaves seasoning and serve.

Note :

Slightly frying the vegetables adds taste. Grinding chutney either coarse or into fine paste is optional.
Use of more / less coconut is optional. Use of more /less chilly is optional.
Time : 10 Minutes.
Serves : 2 to 3 

Thursday, October 25, 2018

Jack Seeds - Southkai Kootu

Mangalore Southekai /Southekai and Jack Seeds Kootu is good to have with Plain Rice, chapatis, rotis, poori, dosa or idli. It is one of the traditional dish of South Canara and we call it as ಹಸಿ ಹುಳಿ .

Dal / Toor or Moong is not used in this curry and very little spices are used here.

Let us see some benefits of eating Coriander Seeds in our diet. 

Coriander Seeds have pleasant aroma and it is used as condiments in our culinary dishes.
Coriander seeds helps in preventing and treating diabetes. It helps in treating osteoporosis. It helps to cure digestive disorder. Helps in preventing abdominal pains. It is good for ladies who suffer during their menstrual chronic/crams pains. It is a good remedy for skin related problems. Good for anemia, for treating inflammation,controlling and regulating high cholesterol levels. It is good for mouth ulcers, indigestion, eye related problems and lowering the blood sugar level. It has a cooling effect on our body and is used for eye related problems. ( Wash and soak coriander seeds for 30 minutes, strain twice with clean towel or cloth and then use it as drops to eyes. It helps in cooling our eyes, sooth our eyes and your eyes will be refreshed). Be careful and it should be clean coriander water, no dust or any dirt should enter our eyes.
Coriander seeds are filled with vitamins and minerals. It is filled with proteins, carbohydrates, phosphorus, calcium, iron, Vitamin B, C and A.
Let us see the recipe Now :
No Onion or Garlic is used here in this Jack Seeds - Southekai Kootu. 
Mangalore Cucumber is known as Mangalore Southekai/ Bannada Southekai, Haladi Southekai.

Things Needed : 

To Cook :
Southe kai / Mangalore Cucumber : 1 Bowl . ( 1/2 of One big Southekai )
Jack Seeds : 1 Small bowl (About 10 Seeds).
Methi Seeds : 1/4 Teaspoon
To Grind :
Fresh Grated Coconut : 5 to 6 Tablespoons
Coriander Seeds : 1 Tablespoon
Tamarind : 1 Big Marble size
Jeera / Cumin Seeds : 1/2 Teaspoon
Pepper Pods : 3 to 4
Red chilly : Byadagi : 4 to 5
 To Add :
Salt : As required
Turmeric Powder : A pinch
Coriander leaves : 1 Tablespoon
Mustard Seasoning : 1 Tablespoon : 1/2 Teaspoon mustard seeds, 1 red chilly, pinch of ingh and curry leaves with 1 tablespoon of coconut oil.


Method :

1. Remove the outer shell of jack seeds and cut them into small pieces. Soak in plain water for 10 minutes.
2. Wash and remove the outer layer, pulp and seeds inside the southekai.
3. Cut Southekai into small pieces and soak in plain water for  5 minutes. It helps in take away the bitterness in Southekai.
4. Put cut Southekai pieces and jack seeds pieces in a pressure cooker. Add methi seeds and required water and cook for 4 to 5 minutes.


5.Grate coconut and add coriander seeds, jeera, red chilly, pepper pods and grind it with required water.
6. Keep a pan on the fire and put cooked Southekai and jack seeds to it. Add turmeric powder and required salt. Mix it well and boil for  2 to 3 minutes.


7. Add ground coconut, coriander mixture to boiling mixture and mix it well. Let it cook for 4 to 5 minutes.

8. Put little coriander leaves to the cooked curry and shift it to the serving dish, Add mustard, red chilly, ingh, curry leaves seasoning on the top.


  9. Serve with the main dish you have prepared. You can add a spoon of fresh ghee just before serving.

Note :

Do not over cook the vegetables. Soaking jack seeds helps to cook seeds nicely and soft. Adding less/more coconut is optional. You can add 1/2 teaspoon of soaked raw rice while grinding. ( Soak raw rice for 5 minutes and then add/ optional). It helps the kootu to be thick. Do not add more tamarind. The curry gets savoury. Use of coconut oil is optional. Do not roast coriander seeds and jeera. Adding methi seeds while cooking vegetable helps to reduce the cholesterol in curry.
Time : 30 Minutes.
Serves : 3 to 4 .

Saturday, October 20, 2018

Millet Mirchi Bajji /Fried Fritters

Mirchi bajji is famous fried fritters these days. Mirchi bajji goes well with a cup of coffee/chai or any other fruit juice.

I have tried this Mirchi bajji using millet flour, besan /channa dal flour, curry leaves chutney powder and other spices. Just wanted to try this fritter with millet flour and it has turned nicely with crispy and soft texture. It has a good taste and of course it is a good choice for having with lunch as a bite by the side.
Let us see the reciepe Now :

Things needed :

Mirchi /Bajji Chilli : 3 to 4
Millet flour : 2 to 3 Tablespoons
Besan / Channa Dal Flour : 2 to 3 Tablespoons
Curry Leaves Chutney Powder : 1 Tablespoon
Chilly powder : 1/2 Teaspoon
Jeera / Cumin Seeds : 1/2 Teaspoon
Salt : As required
Oil : to Fry : 1 Cup

Method :

1. Wash and remove the seeds in Chilly. Slit them in the middle. / You can cut them into two in the middle.
2. Take a big bowl and add millet flour, besan / channa flour, curry leaves chutney powder, salt, chilly powder and jeera/cumin seeds. Mix it well.
3. Add water and prepare the batter. ( Let it be medium thick).


4. Keep a pan on the fire and heat. Add a cup of oil. Let it get hot.
5. Dip each chilly in the batter you have prepared and fry them on medium flame.


6. Turn the other side and fry till they turn golden brown.

7. Remove from the oil and put it on a kitchen tissue.


8. Millet Mirchi Bajji /Fried fritter is ready to serve.


9.Repeat the same and prepare the remaining bajji.
10 Serve as you wish, with a cup of coffee / tea or a cup of juice or for lunch as a bite like papad.


Note :

Careful while you prepare the batter. Let the batter be medium thick. Adding any spice is optional. Curry leaves chutney powder adds to the taste. Adding more chilly powder is optional.
Fry on medium flame so that it cooks well and chilly turns crunchy.
I have the big chilly into two. So that it is easy to fry. No cooking soda is used here.
Time : 20 Minutes.
Serves : 2 to 3.

Monday, October 15, 2018

Oodalu / Barnyard Millet Kichidi

Millets are the healthy grains and people are accepting the healthy benefits they do follow eating millet and do take care of their health.
Here I have used Oodalu / Barnyard millet, moong dal and some simple spices.


Let us see how they are called in different languages.

In Kannada /Karnataka it is called as Oodalu, in Tamil - Kuttiravaali, even in Telugu it is called as Oodalu too. In Hindi - Sanwa or Jhangora and Malayalam - Kavadapullu.

Let us see the benefits of Barnyard millet.

Barnyard millet helps in diabetes, improve the digestive system. It  is said that it helps to lower the risk of cancer. It detoxify the body, improves our respiratory health, boost immune system, increase energy level and improve the muscle and nerve health. It helps in controlling the cholesterol level in our body. They are rich in nutrition. Barnyard millet is rich in Vitamin B, calcium, iron, potassium, zinc and magnesium. They are loaded with dietary fiber. Barnyard millet is free from gluten.
Let us see the recipe now :
No Onion or No Garlic is used in Oodalu /Barnyard Millet Kichidi.

Ingredients :

Oodalu / Barnyard Millet : 1 Cup
Moong Dal : 1/2 Cup
Green chilly : 2
Pepper Pods : 6 to 8
Jeera /Cumin Seeds : 1 Teaspoon
Ingh/Asafoetida : A pinch
Ginger : 1 Teaspoon ( An inch ).
Curry leaves : 6 to 8
Ghee : 3 to 4 Tablespoons
Cashew Nuts : 2 to 3 Tablespoons
Salt : As required

Method :

1. Wash and cook moong dal and Oodalu separately


2. Wash and slit green chilly, cut coriander leaves and curry leaves.
3. Wash and remove the outer layer of ginger and grate it, keep it aside.
4. Crush pepper pods and keep it aside.
5. Keep a pan on the fire and heat. Add ghee jeera, pepper pods and fry for a minute.
6. Add cashew nuts pieces and let it turn golden brown. Add slit green chilly and curry leaves.


7. Keep a pan and add cooked moong and oodalu/Barnyard millet. Mix it well.
8. Add required water and mix it well. Add required salt. a pinch of turmeric powder and let it boil for 2 to 4 minutes. Add seasoned jeera to the cooked Kichidi.
9. Mix it slowly and shift the ready Oodalu Kichidi to a serving bowl.


10. Serve with papad, pickle, ghee and a cup of curd.

Note :

You can wash and soak Oodalu grain for some time. ( 10 minutes). So that it cooks soft and is easy to digest.
Adding any amount of ghee is optional. Adding more /less red chilly is optional.
Time : 20 Minutes.
Serves : 3 to 4.

Wednesday, October 10, 2018

Shavige - Rava - Avarekai Uppittu

Indian breakfast is always a challenging. The home maker or the lady of the house who always think about the food she needs to prepare for the family. Here is such an easy and yummy
Shavige - Rava - Avarekai Uppittu.


So thinking of breakfast, you can provide many Indian food. Uppittu comes to the mind suddenly and it is 100% healthy breakfast. It does contain carbohydrates, minerals and vitamins. I have prepared Uppittu using medium sized rava and shavige/vermicelli.
Avarekai / field beans is available these days. Making use of seasonal vegetable is one of the healthy habit. Field beans are filled with vitamins and minerals.
I have used Avarekai/field beans, medium size rava and Shavige/Vermicelli.
This uppittu is good for any special days like vratha, upavasa or festival or feast days for breakfast.
It is good for people who diet, diabetic people and good snack in the evening and fits into all age group people.
Let us see the recipe now :

NO ONION OR NO GARLIC RECIPE. 

Ingredients :

To Fry :
Rava /Semolina : Medium size : 1 Cup
Shavigev /Vermicelli : 1 Cup

To Cook :
Field Beans : 1 Cup

To Add :
Fresh grated coconut : 1/2 Cup
Ginger : An inch
Lemon Extract : 1 Teaspoon
Salt : As required
Ghee : 2 Tablespoons
Hot boiling water : 3 1/2 cups

To Season :
Oil : 3 to 4 Tablespoons
Mustard seeds : 1 Teaspoon
Urid dal : 1 Teaspoon
Green chilly : 2 to 3
Pepper Pods : 3 to 4
Curry Leaves : 6 to 8 Leaves
Red chilly : 2

Method :

1. Remove the pods from field beans shell and wash it. Pressure cook and keep it aside.
2. Wash green chilly and cut into big pieces.
3. Wash ginger, remove its outer layer, wash it again and grated it. Keep it aside.
4. Grate coconut and keep it aside. Crush pepper pods and keep aside.


5. Keep a pan on the fire and heat. Put oil and mustard seeds, urid dal and let mustard seeds splutter.
6. Add green chilly, pepper pods, curry leaves and fry nicely for a minute.
7. Add rava and fry till the raw smell goes off.


8. Add shavige/vermicelli and fry for 1 to 2 minutes. Keep water for boiling.
9. Add grated ginger, a pinch of turmeric powder,  salt and mix it nicely.


10. Add boiling water and mix all the ingredients nicely. Let it be on low flame while pouring the hot water.

11. Add cooked avarekai and mix it well. Cover and cook for 2 to 3 minutes on low flame. Let all the moisture disappear. Add lemon juice/Extract.

12. Stir Uppittu slowly and mix it well. Add fresh grated coconut and 2 tablespoons of ghee.


13. Put off the fire and mix it once again nicely.


14. Shift the ready Shavige - Rava - Avarekai Uppittu to a serving dish and serve with your choice of side dish.

Note :

Fry rava and shavige nicely. Adding any other vegetable is optional. Adding more /less chilly is optional. Adding more oil or ghee adds to the taste.
Time : 30 Minutes
Serves : 3 to 4 .

Jack fruits Seeds Tikki

Jack fruits are healthy Seasonal fruits. The seeds also contain lots of good vitamins and minerals.  After eating the fruit we throw away th...

About

author
My name is Nalini Somayaji. Teaching is my profession. Cooking is my passion. Reading, travelling, visiting new places, having fun with kids are some of the hobbies I can say. My recipes are Healthy, quick, easy and simple. Grown up being a traditional family member I love and respect Indian culture and traditions. Love classical dance and music.
Learn More →