Showing posts with label red chilly. Show all posts

Thursday, August 23, 2018

Simple Bottle Gourd /Sorekai Dry Palya

Bottle gourd/Sorekai/Doodi is one of the healthy vegetable and it available plenty all around the year.


I have done many recipes with Bottle gourd. Here is a simple,  yummy, easy dry curry which is very quick too. 
I have used simple spices and the bottle gourd. 
Let us see the recipe now : 
No Onion or No garlic is added to this Simple Bottle Gourd /Sorekai Dry Palya

Things Needed :

Sorekai / Bottle gourd pieces : 1 Bowl.
Red byadagi chilly : 2 
Jaggery : 1 Tablespoon
Coconut : 2 to 3 Tablespoons
Salt : As required
Coconut Oil : 1 Tablespoon
Mustard seeds /Sasive : 1/2 Teaspoon
Urid dal /Uddina bele : 1/2 Teaspoon
Curry leaves :  6 to 8
Coriander leaves : 1 Tablespoon ( Optional)

Method :

1. Wash and peel of the outer layer of bottle gourd./Sorekai.
2. Cut bottle gourd into very small pieces and cook with required water till soft.


3. Grate coconut and keep it aside. Wash coriander leaves and curry leaves and cut into small.
4. Keep a pan on the fire and heat. Add coconut oil, mustard seeds and urid dal.
5. Cut red chilly into two to three pieces and put it the seasoning.
6. Let mustard splutter. Add curry leaves and mix it once.
7. Add cooked bottle gourd pieces and jaggery. Mix it well.


8. Add turmeric powder (a pinch) and required salt. Let jaggery melt and mix it with the pieces.
9. Let all the moisture disappear completely. Put off the fire and add grated coconut.
10. Mix it well and shift the ready dry palya .curry to a serving dish.


11. Add coriander leaves on the top.


12. Serve with the main dish you have prepared. We had this curry as one of the side dish with our lunch.

Note :

You need to cook bottle gourd pieces till soft to get good taste. (Do not over cook).
Adding jaggery is optional. We like to add little jaggery in some of the dishes in Udupi style of cooking. Adding green chilly instead of red chilly is optional. Taste differ. No need to add more oil. Do not cook the curry after adding fresh coconut. Adding coriander leaves is optional.
Time : 15 Minutes
Serves : 2 to 3 
Purely : Udupi Taste /Karnataka /India .

Tuesday, June 12, 2018

Raw Mango Traditional Pickle / Kethe Uppina Kai

Raw mango Traditional Pickle  as we call it is one of the traditional dish done with raw mangoes. This pickle  is used as one of the side dish with dosa, idli, rice, curd rice and many more main dishes. This pickle can be prepared it quickly.
It is so easy to prepare and we do enjoy eating with Ganji.


This pickle is so handy and it helps and eases our daily work . In South Canara in our homes we normally do not prepare chutney always. It has become a habit that we use varieties of pickles especially mango pickles. The varieties of mango pickle like, ಕೆತ್ತೆ, ಅಡುಗಾಯಿ, ಮಿಡಿ, ಹಿಂಡಿ, /kette, adugaayi, midi, hindi etc. Each type of pickle is yummy to taste and some last long at least for 2 to 3 years even.
This particular variety of pickle is done very easily and quickly. Normally when the raw mango starts this variety of pickle is prepared.
I have used raw mango, mustard seeds, coconut oil, and  red chilly powder.
I have used two  big raw mangoes.
Let us see the recipe

Things needed :

Raw mango : 2 :Big size
Mustard seeds : 2 Tablespoons
Salt : 5 to 6 Tablespoons
Chilly Powder : 3 to 4 Tablespoons
To Season/Temper :
Coconut Oil : 1 Tablespoon
Mustard seeds : 1 Teaspoon
Ingh /Asafoetida : A pinch

Method :

1. Wash and wipe mango with clean towel. Leave it for a few minutes.
2. Peel off the green outer layer and cut mango into very small pieces.
3. Take a big bowl and put mango pieces and salt. Mix it well and leave it for a day.
4. Now keep a pan on the fire and put a glass of water. Put a handful of salt and boil till it reduces to half.
5. Add salt water from the mango you have dipped. Let it boil for a minute. Put the cut mango pieces to boiling salt water and put off the fire. Let it cool.
6. Grind mustard seeds and chilly powder with cooled salt water. Let mustard seeds turn as paste.
7. Remove it from mixi jar and mix it with mango pieces. \
8. Let the ground paste and mango pieces mixes well.
9. Add coconut oil, mustard seeds and ingh/Asafoetida seasoning and mix it nicely.
10. Let it cool completely. Store it in a glass bottle and use it as you like. Better to store in fridge.


Note

Remember that to wipe mango nicely and then use it. Adding more oil, chilly powder is optional.
Use of coconut oil is optional.
Any brand of chilly powder is optional. I have used MTR red chilly powder.
Time : 20 Minutes.
Serves : Depends upon the servings.

Saturday, June 9, 2018

Ondelaga /Gotu Kola / leaves Chutney

We South Indians like chutneys. Chutney goes well with all the main dishes.

It is one of the healthy habit to eat chutney with lunch /breakfast or snacks. Chutney is prepared using coconut/dals, vegetables etc. Here is a healthy chutney prepared using Ondelaga.
Ondelaga /Gotukola is also known as Brahmi leaves.
Ondelaga is called in different names in different language.
Botanical name for Ondelaga is Centella Asiatica and other names are Indian Pennywort and Asiatic Pennywort. In Kannada these leaves are called as Ondelaga/ Uraga / Brahmi leaves.
In Telugu it is known as Saraswathi Akku, Tamil: Vallari Kirai, in Marati it is called as Karivan / Karivana. In Gujarathi is Khanda Brahmi , In Bengali it is known as Tulkudi adn in Hindi it is known as Bensag Brahmi.
Ondelaga leaves and benefits :
Ondelaga leaf is one of the medicinal herb which is also used in cooking. It is used as a memory enhancer. It contain antioxidants and regulates the blood sugar levels in diabetic people. Ondelaga has cooking property and it helps to keep the mind calm and free from anxiety. It also helps to sleep well. It is normally said that eating Ondelaga helps to improve our memory and good for children. The shape of the leaf is just like our cerebellum and it helps in controlling concentration and memory. Ondelaga leaf helps in rebuilding brain tissues by influencing the brain cells. It helps in building strong immunity in our body.
These Ondelaga Leaves are used in hair oil and is good for strong healthy hair.
Please note  do not consume these leaves in big quantity, it might cause headache, giddiness.
Let us see the recipe now :
Do not fry these leaves much in oil. So that the medicinal value in the leaf will retain its properties in them.
Ondelaga/Gotukola  leaves chutney goes well with all the main dish. Yummy taste with hot rice and a teaspoon of ghee, goes well with dosas and idli also.
It is simple and healthy and anyone can try this chutney. You do get these Ondelaga Leaves in most of the market.
Tip : Handful of Ondelaga leaves are more than enough to use for 1 time. Do not eat regularly.  Once in a week or twice a week will be ok.
These Ondelaga Leaves are from Our home. We have planted them in a small pot. They grow plenty within no time.
Lets see the recipe now :

Things Needed :

Ondelaga /Gotukola Leaves : 1 Handful
Urid dal : 1 Tablespoon
Red chilly : 4 to 5
Curry Leaves : 5 to 6
Ingh /Asafoetida : A little
Tamarind  : Small marble size
Fresh grated coconut : 1 Cup ( 1/2 of one small coconut)
Salt : As required
To Season/temper
Coconut Oil : 1 Teaspoon
Mustard seeds : 1/2 Teaspoon
Ingh /Asafoetida : A little
Curry Leaves : 5 to 6

Method :

1. Wash and keep aside Ondelaga leaves and curry leaves.

2. Grate coconut and keep it aside.
 3. Keep a small pan on the fire and heat. Add oil. Let it get heated.
4. Add urid dal and fry till they turn golden brown. Remove fried urid dal to a plate.
5. Add red chilly and fry nicely. Let it get crunchy. Add ingh and curry leaves. Put off the fire.
6. Add grated coconut, ondelaga leaves and mix it well. Let it cool.

7. Now grind all the ingredients required salt, tamarind and required water til it turns your desired consistency.
8. Remove from the mixi jar and put it in a serving bowl. Add tempered mustard and curry leaves.

9. Serve with the main dish of your choice.

10.We had Ondelaga /Gotukola Leaves chutney with Hot plain rice with ghee. NO need to say it was Yummmmmmmy..

Note:

There are two varieties of Ondelaga Leaves.
Type 1 : The leaf is small and thin. You can use the stem also in this type of leaf.


Type : 2 : The leaf is thick, darker than the local variety. It is hybrid leaf. Remove the stem and then use it. The stem is bit hard and it does not grind into paste. I have used these Ondelaga leaves from our garden
Ondelaga leaves are also known as brahmi leaves. It is always better not to cook this leaves. You can also use these leaves like coriander leaves, putting it on the top. Cut into very thin pieces. I have seen in Cambodia ppl use this leaves even on the top of Pizza. ( As they are one or two whole leaves kept on the top of Pizza while serving). Use of more chilly is optional. Use of byadagi chilli is optional.You can use guntoor chilly also. ( The one who likes it very spicy). .
Time : 15 Minutes 

Serves : 2 to 3. 

Wednesday, May 2, 2018

Onion - Avalakki Uppugari

Avalakki Uppugari/Quick Avalakki is one of the very famous dish from Udupi and Dakshina Kannada region. Any time you can prepare this Avalakki and enjoy. 


I remember those days I spent in Udyavara near Udupi. My doddamma and doddappa had paddy field and they used to grow paddy, cow peas, horse gram, urid etc, etc,  etc. There were some workers staying in near by our house. My doddamma was  kind hearted woman who used to prepare breakfast for all the workers who come in the early morning for work. This Avalakki Uppugari is very famous and every one's favourite. My doddamma never used onions and instead of that she used to add more coconut. 
Avalakki Uppugari and a cup of Chai goes hand in hand at any time of the day.
Wherever you go or in many Konkani Hotels this type of Avalakki chat is available even now. (Even in small villages).
 I have used onions and little fried shavige (Sev). Thin Avalakki, coconut, jaggery and coconut oil's seasoning is added and that gives a yummy taste to Avalakki Uppugari.
Let us see the recipe now :

Things Needed :

Thin variety Avalakki : 2 Cups ( 2 Handful)
Coconut :  3 to 4 Tablespoons
Jaggery : 2 Teaspoons
Salt : A little ( As required )
Rasam Powder : 1 Teaspoon
Thin variety of Sev : 1/2 Cup/5 to 6 Tablespoons
Seasoning :
Coconut Oil : 2 Teaspoons
Urid dal : 1/2 Teaspoon
Mustard Seeds : 1 Teaspoon
Red chilly ( Byadagi ) : 1 
Curry Leaves : 6 to 8 or little more leaves 

Method :

1. Clean thin Avalakki/Poha/ Aval and keep it aside.
2.Grate fresh coconut and keep it aside.
3. Remove the outer layer of onion and cut into small pieces.
4. Take a big bowl, add grated coconut, cut onions, rasam powder, salt and jaggery. 
5. Mix all the ingredients and add avalakki and mix it well.

6. Keep a pan add coconut oil, mustard seeds and urid dal. Cut red chilly into 2 to pieces and add.
7. Let mustard seeds splutter. Add curry leaves and put off the fire.
8. Add this seasoning to ready Avalakki mixture. Mix it well nicely with hand.


9. Put it in a serving dish and add little Sev on the top and serve.


Note :

This Avalakki should be served as soon as you prepare it. Or it turns soft and onion added avalakki is not good for health. Adding onion is optional. It adds to the taste. Adding grated carrots is optional. I have not added. You should use fresh coconut. It adds to aroma and softens the avalakki. Adding Sev is optional. You can add roasted groundnuts. 

Time : 10 Minutes 
Serves : 2 to 3.

Saturday, January 27, 2018

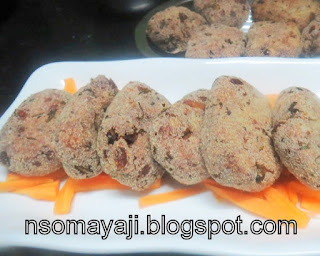
Pigeon Peas Cutlet

Pigeon Pea/togari kalu/whole green toor is available plenty in the market. Normally it is the season of pigeon peas during the winter. You do get good tender peas and we can prepare many dishes using pigeon peas.

I have prepared pigeon peas and cluster beans dry curry for the afternoon lunch and little curry was left and as usual just used this remaining dry curry with some potatoes and prepared Cutlets for the evening and it was just beautiful to have it as snack.

No Onion Or No garlic in this " Pigeon Peas Cutlet".

Let us see the recipe now :

Things needed :

Pigeon Peas Dry Curry : 1 Bowl
Potatoes : 2 to 3
Coriander leaves : One handful
Ginger : An inch
Bread slices : 3 to 4
Jeera/cumin seeds : 1 Teaspoon
Garam Masala : 1/2 Teaspoon
Red chilly Powder : 1/2 Teaspoon
Rava /Semolina : Chiroti rava /Thin variety of rava : 1/2 Cup
Salt : As required
Oil : To Fry (1 Cup)


Method :
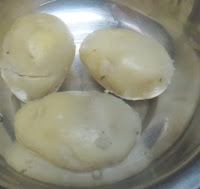
1. Wash and boil potatoes and remove its skin and smash it nicely.

2. Wash and cut coriander leaves into thin pieces. Wash ginger, remove the outer layer and wash it again. Grate it and keep it aside.
3. Powder bread crumbs and put it in a bowl.
4. Now put all the ingredients in a big bowl and mix it nicely. (Smashed potatoes, cut coriander leaves, grated ginger, powdered bread crumbs, salt, garam masala, chilly powder and jeera).

5. Divide the dough into small ball size.

6. Keep a pan on the fire and heat. Add oil let it heat.
7. Take a small portion of the cutlet mixture and give a shape of your desire.

8. Dip them in raw rava/semolina  and fry in medium hot oil.
9. Fry the cutlet nicely on both sides.

     Remove it from oil and put it on a kitchen tissue.

10. Serve Hot Cutlets with ketchup/any type of chutney

11. Repeat the same with remaining dough.

12.You can also shallow fry these Pigeon Peas Cutlets. (Healthy Option).

Note :

I have deep fried these cutlets. You can shallow fry them on tava. (Optional).
Do not overcook potatoes. You can use flattened rice/Avalakki instead of bread. I have used brown bread. You can powder the bread slices with a mixi dry grinder. You can also add onions and garlic to cutlet dough. I have not added.
Time : 30 Minutes.
Serves : 3 to 4.
 Indian Food .
Pigeon Peas -Cluster beans Dry Curry 

Sunday, August 31, 2014

Ridge gourd- Sesame Chutney

Chutney is a side dish and we can prepare many types of chutneys. Chutney is normally one of the side dish and goes well with Plain rice, any mixed masala rice, with roti, chapati, dosa idli etc.
We especially South Canara side people do prepare chutneys from peel/ the outer layer of many vegetables. Here is such one of the chutney and it can be prepared easily and it is 100% yemmy and healthy chutney.  I have used Ridge gourd peel, Kesu leaves stem (Colocasia leaves) (optional), Sesame seeds and  Coconut.

Let us see some benefits of Sesame seeds:
Sesame seeds are one of the oldest condiments known to man. They are excellent source of copper and very good source of manganese, calcium, magnesium, iron, phosphorus, vitamin B1,zinc, and dietary fiber.It also contain the beneficial fiber called Lignans.Sesame seeds are rich in quality vitamins and minerals. They are very good sources of B complex vitamins. Sesame seeds are full of high quality protein. Sesame seeds contain magnesium and other nutrients. and also improve plasma glucose in hypersensitive diabetics. They help to reduce blood pressure. They help to lower Cholesterol and good for digestion since the high content of fiber in sesame seeds help to digest the food. They are very good for healthy skin. The high content of zinc in sesame helps repair the damaged body tissue. Having so many good qualities of sesame seeds needs to be added in our daily diet.

Here is a spicy " Ridge gourd- Sesame Chutney"  which can be prepared easily and as I said this dish can be served as side dish with main dish. It will be surely loved by the whole family and fits the taste of all age group. 

Things Needed :

Ridge gourd skin. ( Outer layer) :  2 Cups
Sesame Seeds : 2 Table spoons.
Red chilly : 5 to 6
Coriander seeds : 1/2 Tea spoon
Green Chilly
Turmeric powder : a pinch
Coconut : 1 Cup
Tamarind : Small marble size
Salt : required
Oil : 1 Tea spoon
Mustard seeds : 1/2 Tea spoon
Ingh : a pinch
Curry leaves : 1 Handful


Method :

1. Wash and remove the edges or scratch out the edges and wash the ridge gourd again. Remove the outer skin and cut it into small. Cook them in a pressure cooker with little water, salt, tamarind, turmeric powder, green chilly and coriander seeds. Let it cool.

2. Roast or fry sesame seeds till they are brown (pop up) with red chilly, curry leaves and ingh.

3. Grate coconut.
4. Grind cooked and cooled ridge gourd skin, roasted or fried sesame seeds, coconut with little water.

5. Add salt if required. Remove Chutney from the liquidizer. (Mixi) to  a serving bowl.

6. Add mustard seeds- curry leaves ingh spurt to the chutney and serve with the main dish you have prepared.

Note :

I have also added Colocasia leaves stems while cooking ridge gourd skins. we can also use only colocasia stems and prepare this chutney. It is purely optional. It adds to the flavour and fully fiber.
Adding more or less chilly is also optional. You can add thin cut onions just before serving chutney. (optional).

Time : 15 Minutes.
Serves : 4 to 5  
  My next recipe will be Raagi - Jolada Rotti using this spicy chutney.  ( Finger Millet + Millet   Flour Rotti ).


Jack fruits Seeds Tikki

Jack fruits are healthy Seasonal fruits. The seeds also contain lots of good vitamins and minerals.  After eating the fruit we throw away th...

About

author
My name is Nalini Somayaji. Teaching is my profession. Cooking is my passion. Reading, travelling, visiting new places, having fun with kids are some of the hobbies I can say. My recipes are Healthy, quick, easy and simple. Grown up being a traditional family member I love and respect Indian culture and traditions. Love classical dance and music.
Learn More →